 Move Welcome to CIO Assistant!
Open Welcome to CIO Assistant!
CIO Assistant is the ultimate toolkit for CIOs and IT managers who want to take full control of their time, budget, and reporting. It offers clear, effective tools and methods to manage and optimize IT expenses, investments, and chargebacks across organizations of any size.
With CIO Assistant, you can build highly accurate budgets year after year while automating time-consuming preparation tasks and executive reporting. Beautiful, customizable, and actionable reports will help you stand out during annual budget reviews.
Finance and Controlling teams will appreciate it too: thanks to flexible chart-of-accounts integration and detailed allocation methods, it’s easy to deliver an accounting-friendly view of the IT budget and ensure fair, transparent chargebacks — even in complex organizational structures.
You can easily share CIO Assistant data with your team to support expense maintenance and self-service reporting. Role-based access control makes it simple to manage permissions and enable seamless col
Welcome to CIO Assistant!
156 words
Move Navigation
Open Navigation
CIO Assistant provides a simple and intuitive interface.
Top bar
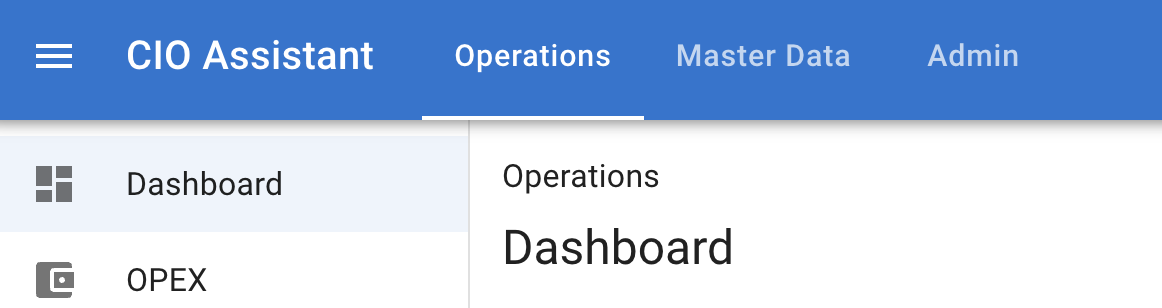
The burger menu in the top-left corner collapses the left panel.
This is especially useful when working with large data grids or on smaller screens.
The Operations tab contains tools for daily activities:
- OPEX and CAPEX Management
- Contracts
- Tasks
- Reporting
- Budget Operations
You’ll spend most of your time here.
The Master Data tab is used to manage the structural information within CIO Assistant, including:
- Companies
- Departments
- Suppliers
- Contacts
- Chart of Accounts
- Accounts
- Analytics
- Master Data Operations
The Admin tab, as the name suggests, includes all administrative functions:
- User Management
- Role Management
- Billing Center
Applica
Navigation
234 words
Move Onboarding steps
Open Onboarding steps
We recommend building your CIO Assistant tenant in the following order.
1. Initialize Your Master Data
Start by setting up clean master data — this foundation ensures the accuracy and reliability of all future operations and reports.
- Companies: A default company is already created under the tenant name you provided. You can keep it, rename it, or remove it and create new ones.
- Departments: Add departments — these will be useful later for allocations.
- Suppliers: Create your first suppliers.
- Chart of Accounts: Load a preconfigured chart of accounts or create your own from scratch.
- Analytics Categories (optional): Set up analytics categories if you wish to track data with more granularity.
💡 While it’s possible to rush through these steps, we recommend taking the time to enter complete and accurate information.
High-quality master data is key to ensuring the assistant’s usability and the precision of your reports.
2. Create Your
Onboarding steps
449 words
Move Companies
Open Companies
Companies are the foundation of your master data. They're the entities you allocate IT spend to and report chargebacks for.
When your workspace is created, it starts with one company named after your organization. You can rename it or add more.
Getting started
- Create a company or open the existing one, then fill the essentials:
- Country (ISO code), City, Base Currency (ISO code)
- Name (what your teams recognize)
- Chart of Accounts (automatically assigned based on country, but can be changed)
- That's enough to start. You can add address, registration/VAT, and notes later as needed.
Tip: City and Base Currency are required; keep names unique to avoid confusion in imports and selection lists.
Chart of Accounts
Each company can be linked to a Chart of Accounts (CoA), which defines the set of accounts available when recording OPEX or CAPEX items for that company.
How it works:
- When you create a company, it's automatical
Companies
941 words
Move Departments
Open Departments
Departments represent the internal teams and cost centers inside each company. They’re how you split costs within a company and report chargebacks at a useful level of detail.
Getting Started
Create a department under the right company and fill the essentials:
- Company (which company this department belongs to)
- Name (what your teams recognize)
That’s enough to start. Description is optional. Tip: keep names unique within each company; this makes CSVs and lookups predictable.
Status and Disabled Date
Use the Disabled date to schedule when a department stops being “active.”
- Enabled by default. You can set a future Disabled date.
- After the Disabled date:
- It no longer appears in new selections (e.g., allocations and editors that fetch active lists).
- Historical data remains intact; reports for years when it was active still include it.
- Lists default to “Enabled.” Clear or change the Status filter to review disabled or historical entries.
- Prefer disabling over
Departments
548 words
Move Suppliers & Contacts
Open Suppliers & Contacts
Suppliers and contacts work together to manage vendor relationships. Suppliers are the vendors you buy from; contacts are the external people at those organizations.
Suppliers
Suppliers are referenced throughout the app when you create OPEX, CAPEX, or contracts.
Getting started
- Create a supplier with a unique name.
- Optionally add an ERP Supplier ID if you sync with external procurement systems.
- Link contacts later from the Contacts tab.
Tip: Keep supplier names consistent with your external systems to avoid duplicates.
Status and Disabled date
Use the Disabled date to control when a supplier stops being active.
- After the Disabled date:
- No longer appears in selection lists for new spend or contracts.
- Excluded from reports for strictly later years.
- Historical data remains intact.
- Prefer disabling over deleting to keep history consistent.
Managing contacts (Contacts tab)
Link external contacts to suppliers by role:
Suppliers & Contacts
517 words
Move Chart of Accounts & Accounts
Open Chart of Accounts & Accounts
Charts of Accounts (CoA) organize your accounting structure by grouping accounts into named sets. Each company can be linked to a CoA, which determines which accounts are available when recording OPEX or CAPEX items.
Why use Charts of Accounts?
Without CoAs, all accounts are available to all companies, making it easy to accidentally use the wrong account or mix accounting standards across entities. Charts of Accounts solve this by:
- Ensuring consistency: Companies only see accounts from their assigned CoA
- Supporting multiple standards: Different countries or business units can use different account structures
- Simplifying selection: Account dropdowns show only relevant accounts, not your entire catalog
- Enabling templates: Load pre-configured account sets from country-specific templates
- ** Enabling consolidation**: All template accounts come with a native account and an IFRS-based consolidation account, which enables daily work on localized accounts and central r
Chart of Accounts & Accounts
2,864 words
Move Currency
Open Currency
The Currency Settings page (Master Data → Currency) is where you configure how currencies are stored, displayed, and converted across your workspace. It controls the tenant-wide reporting currency, default currencies for new items, and optional restrictions on which currencies can be used.
The Currency Settings form
Reporting Currency
The tenant-wide currency used for all reports, totals, and list displays. When you change this currency:
- All OPEX and CAPEX yearly columns convert to the new reporting currency
- Totals in reports recalculate using the new base
- Your stored item data remains unchanged—only display and conversion are affected
Example: If you switch from EUR to USD, your OPEX list totals will show in USD, but each item's stored currency (EUR, GBP, etc.) stays the same.
Tip: Choose a reporting currency that matches your group's financial reporting standard (e.g., EUR for European headquarters, USD for US-based groups).
Default OPEX Currency
Currency
1,999 words
Move Analytics categories
Open Analytics categories
Analytics Categories provide a flexible, optional dimension for classifying and analyzing your IT budget. Unlike the formal structure of Companies, Departments, and Accounts, analytics categories let you create custom groupings that match your reporting needs.
What are Analytics Categories for?
Analytics categories give you a lightweight way to tag spend items for custom reporting and analysis. They work independently of your formal accounting structure, letting you create ad-hoc classifications without restructuring your master data.
Common use cases:
- Classify by expense type: "Infrastructure," "Application Development," "Cloud Hosting," "Consulting," "Licenses"
- Map to initiatives: "Digital Transformation," "Security Enhancement," "Cloud Migration"
- Flexible departmental mapping: Approximate attribution without strict allocation rules ("Operations," "R&D," "Customer Support")
- Technology stack views: "SAP," "Microsoft 365," "AWS," "Salesforce"
**Key charac
Analytics categories
835 words
Move Master Data Operations
Open Master Data Operations
Master Data Operations provide administrative tools to manage company and department metrics across fiscal years. These operations help you prepare annual budgets, protect finalized data, and maintain year-over-year consistency.
Access these tools at Master Data → Master Data Ops.
Available operations
Freeze / Unfreeze Data
Lock or unlock company and department metrics for a specific year to prevent accidental changes after data is finalized.
Use cases:
- Protect finalized metrics after year-end close
- Prevent edits during audit or reporting periods
- Lock baseline data before starting next year's planning
How it works:
- Select the year you want to freeze or unfreeze
- Choose which data to freeze: Companies (headcount, IT users, turnover) or Departments (headcount)
- Click Freeze Data to lock the selected data, or Unfreeze Data to unlock it
Status display:
- Frozen: Data cannot be edited (shown in red)
- **Editabl
Master Data Operations
1,370 words
Move Enabled-Disabled Status
Open Enabled-Disabled Status
The status of objects is a key CIO Assistant concept.
Enabled / Disabled
Enabled objects are available to use without restriction in the app and reports.
However, companies, departments, spend items, etc... All have a possible end of life: a company can be closed or sold, a contract can end, companies can be reorganized...
To disable an item, click the toggle switch. This will automatically set the "disabled date" at the current date, but you can modify this date to the past or the future. If in the future, the item will remain enabled until the date is reached.
Disabled status effect
Disabling an item has several consequences in CIO Assistant :
- It is hidden by default in all grid views as soon as the disabled date is reached. You can edit the filter to show disabled items if you need to.
- It becomes unavailable to use in drop down menus or selections as soon as the disabled date is reached: for instance, a disabled company won't be available when creating allocations.
- It gets excl
Enabled-Disabled Status
235 words